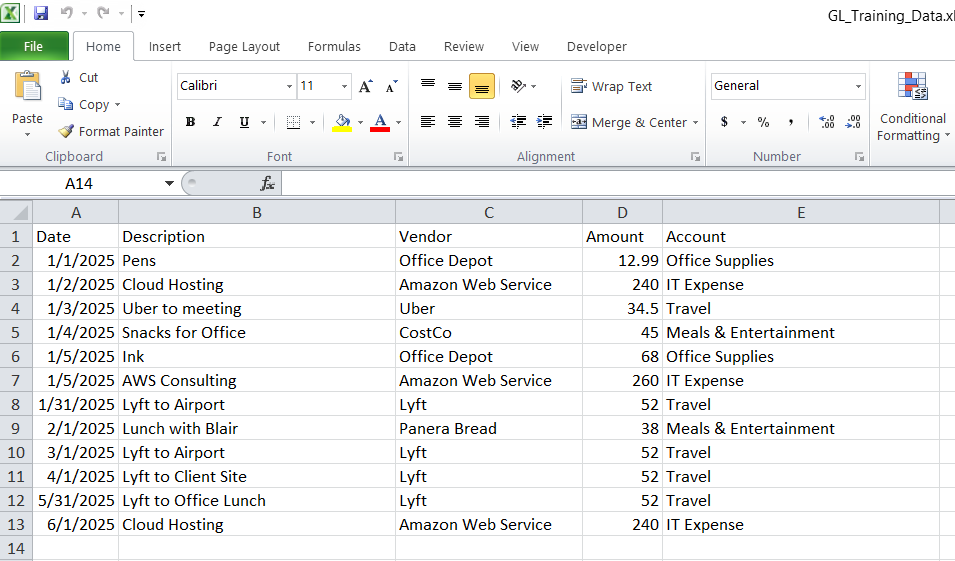
A common financial review task is to identify and investigate expense accruals over a certain age. This helps us ferret out estimates that got stuck or maybe even items paid from another expense line. When a reviewer is tasked with dozens of reviews it can be easy to miss one and I though maybe a small app dedicated to identifying these would be beneficial.
Welcome to the first in a series of MicroApps, these will be small Python based apps that focus on one task. This comes from the Linux mehodology of make one application that does one thing really well. In this series we’ll build several applications dedicated to a sole function. This will allow the user to build a toolkit which they can depoly in depening on the situation they are in.
One of the first challenges for this MicroApp is building a way for Python to find stale accruals. The General Ledger (GL) date is useless sine it will tend to be a date in the period, so the best key is to parse the description. Of course the application needs to be nimble enough to parse the string and find a meaningful date from it.
This project was written in Python 3 using the regex and Pandas modules to support it’s code. For this post we’ll keep this high level – if you’re interested in the code please let me know!
The goals for this application are to:
- Read a GL export
- extracts the intended accrual period from the description
- compares it to the current period
- flags stale accruals
- includes property numbers (because CRE always needs property context)
- run from a simple command‑line interface
Even though this is a small tool, I organized it like a real Python project. Each file has one job, which keeps the code clean, readable, and easy to extend as I build more MicroApps.
These are the program files I’ve created and their purpose:
| parser.py | Extracts dates from messy GL descriptions using regex patterns. This is where the “intelligence” of the tool lives. |
| detector.py | Applies the stale‑accrual logic. It takes the parsed dates, compares them to the current period, and assigns a status like ok, warning, or stale. |
| utils.py | Handles loading the GL file into a DataFrame. This will become reusable across future tools. |
| main.py | The command‑line interface. This is the file you run to execute the tool. |
| __init__.py | An empty file that tells Python, “This folder is a package.” Without it, the imports between these files wouldn’t work. This structure might look like overkill for a tiny script, but it sets me up to reuse pieces of this project in future micro‑apps — and it teaches beginners how real Python projects are organized. |
How the Tool Works
The logic is simple:
- Load the GL file
- Identify accrual‑like entries (based on keywords)
- Extract a date from the description
- Normalize it into a real period end date
- Compare it to the current period
- Flag anything older than 60–90 days
This is the kind of problem where regex shines — descriptions are messy, but they follow patterns.
The Parser (parser.py)
This file looks for patterns like:
MM/DD/YYMM/YYYYMM-YYYYSeptember 25Sep 2025
It returns a real datetime object representing the period.
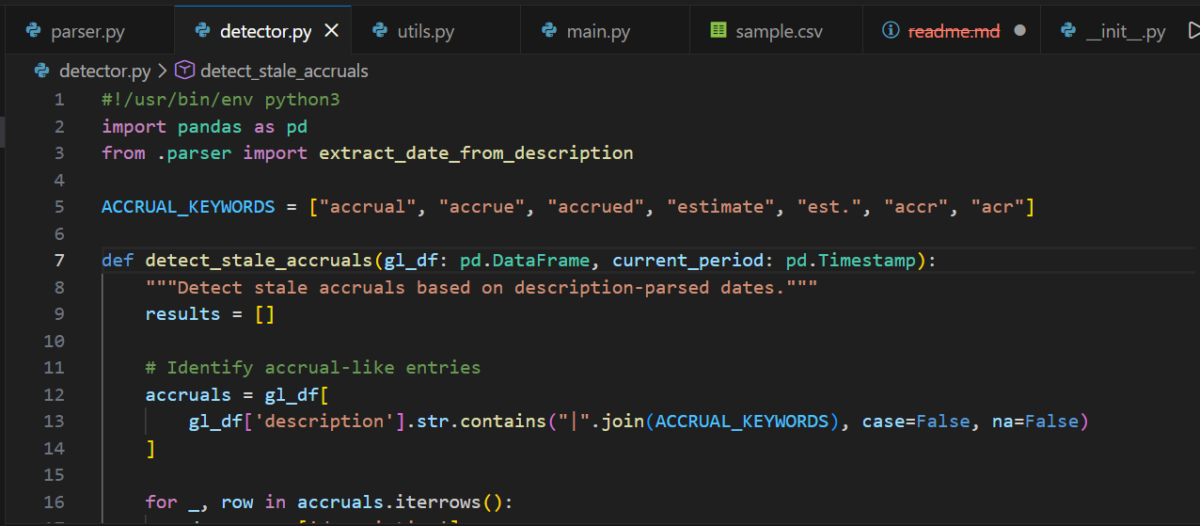
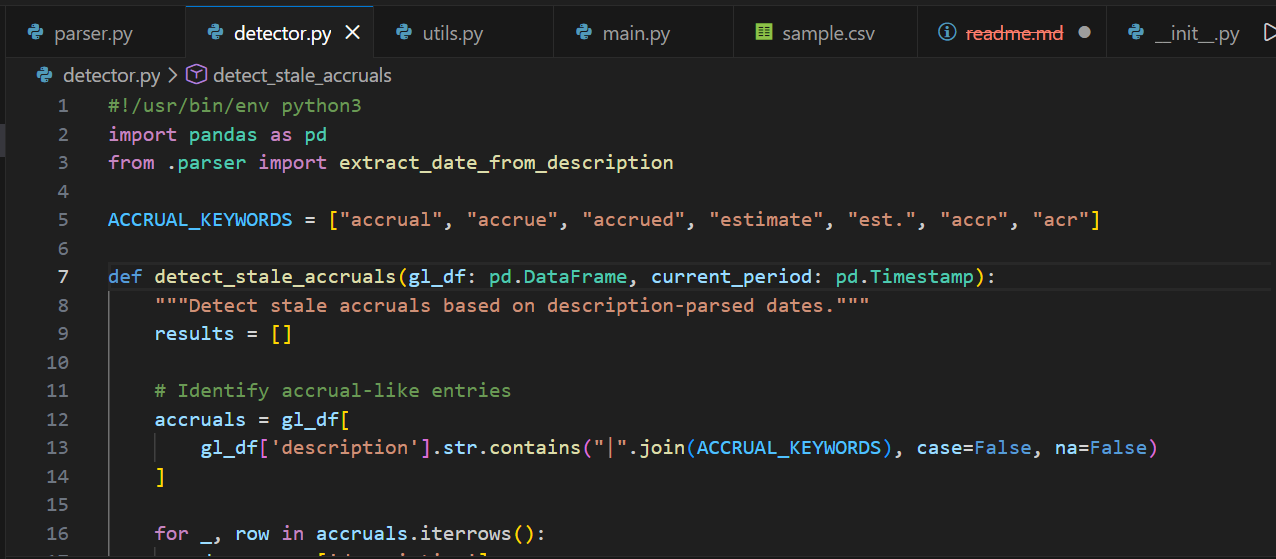
The Detector (detector.py)
This file:
- filters for accrual‑like descriptions
- applies the parser
- calculates age in days
- assigns a status
- includes the property number in the output
The output is a clean DataFrame you can export, filter, or drop into a report.
Running the Tool
From the parent directory of the project:
python -m StaleAccrualChecker.main gl.csv --current 2025-12-31
This prints a table of stale accruals, including:
- property number
- description
- amount
- parsed period
- age in days
- status
Example:
| property_number | description | amount | parsed_period | age_days | status |
|---|---|---|---|---|---|
| 1001 | 04/2025 Window Cleaning Accrual | 4500 | 2025‑04‑30 | 210 | stale |
Closing
If you’ve ever stared at a GL description trying to guess how old an accrual really is… this tool is for you. It’s small, practical, and easy to extend — and it’s the perfect starting point for building a real accounting automation toolkit in Python.
Do you want to learn how to automate your financial workpapers? Do you want to build MicroApps like this one to bloster your own automation toolkit? Do you want to get started with VBA?
My book, Beginning Microsoft Excel VBA Programming for Accountants has many examples like this to teach you to use Excel to maximize your productivity! It’s available on Amazon,Apple iBooks and other eBook retailers!


[…] Excel EOMONTH Function Leads to Consistent Expense Accruals […]